Your In-Shop Engineer: How to Make a Steel Roller Explained

Steel rollers are vital tools in the realm of metal processing, used for bending, shaping, and forming metal into arcs, circles, and various complex forms with precision and efficiency. These rollers, also known as metal roller benders or slip rollers, are indispensable for anyone working with metal—from hobbyists to professional fabricators. While commercial steel rollers are readily available, they often come with a high price tag and may not always fit the specific needs or constraints of every project. This brings us to the viable and gratifying alternative: understanding how to make a steel roller yourself. Building a DIY steel roller not only offers the flexibility to customize the tool according to specific requirements but also provides a profound sense of accomplishment and empowerment. Embarking on a project to craft your own steel roller bender combines the joys of creation with practical utility, allowing you to explore the intricacies of metalworking while tailoring your tools to your personal or professional goals.
Required Materials and Tools for How to Make a Steel Roller
A well-structured understanding of the types of tools and materials is essential before we embark on learning how to make a steel roller. Making your own steel roller requires a careful selection of particular materials along with a set of standard and specialized tools to ensure the roller turns out reliable, durable, and effective. Here we’ll delve into a detailed breakdown of all the necessary components.
Materials
- Steel: The primary material for building the roller, ideally a suitable mild steel or box section steel. Different elements of the roller will require varied dimensions, so you’ll need an assortment of steel sizes.
- Bearings: To reduce metal-to-metal contact and friction, you’ll need reliable bearings. Make sure they are compatible with your design specifics.
- Bolts, Screws, and Nuts: Various types and sizes, most importantly, sturdy carriage bolts to hold the structure together and allow for adjustments.
- Threaded Rod: For adjusting the pressure on the roller bender.
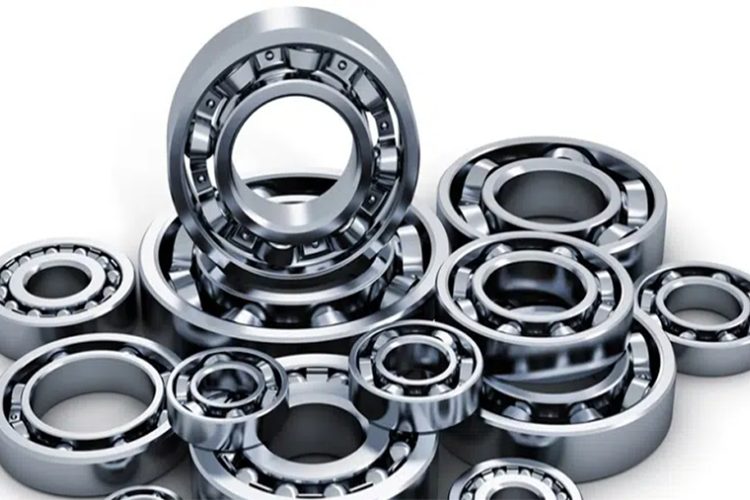
Bearings
Tools
The task of learning how to make a steel roller requires several tools, each serving a unique purpose in the process. Here is a quick overview of the essential tools you might need:
- Welder: A reliable welder is essential for attaching your components together securely.
- Angle Grinder: Essential for smoothing out rough edges and making finer adjustments to the shape of the parts.
- Bench Vise and Wrenches: Useful for holding parts securely during the assembly process.
- Drill: Used for making holes in your steel pieces where required.
- Measuring and Marking Tools: A tape measure, square, and marking pen or scriber are essential for accurate measurements and markings.
It’s important to note that this is a basic list of materials and tools. The specifics may vary depending on your design and functional requirements of the roller bender. Always remember that understanding how to make a steel roller requires preparation and precision in terms of material and tool-selection. Now that we have all the materials and tools ready, we are one step closer to building our very own steel roller!
How to Make a Steel Roller: Building Homemade Roller Bending Machine
Embarking on a project to create a homemade roller bending machine is an exciting endeavor for any DIY enthusiast. It’s a fantastic way to not only build a tool that can serve you well in numerous projects but also to deepen your understanding and skills in metalworking. In this detailed guide, we shall explore the foundational steps on how to make a steel roller, highlighting the importance of DIY planning and where you can find reliable homemade roller bending machine plans.
The Importance of DIY Planning
Before diving into the mechanical aspects of how to make a steel roller, let’s talk about planning, which is arguably the most crucial step in ensuring the success of your project. Effective planning involves understanding the design and mechanics of the machine, sourcing the right materials and tools, and preparing a clear, step-by-step procedure for the construction process.
Precision in planning ensures that:
- Resources are optimized: By knowing exactly what materials and tools are needed, you can avoid unnecessary expenses.
- Time is managed well: A clear plan provides a roadmap, helping you stay on track and significantly reducing the time wasted on trial and error.
- Safety measures are taken: Understanding the construction process ahead of time allows you to identify potential hazards and take the necessary precautions.
- Quality is ensured: Meticulous planning leads to a more reliable and efficient roller bending machine.
Homemade Roller Bending Machine Plans
Now that we understand the value of thorough planning, let’s discuss where to find homemade roller bending machine plans and how these resources can help you in your quest on how to make a steel roller. A wide variety of plans are available through different mediums, each offering unique design perspectives and levels of detail. Here are some of the best places to start your search:
- Online metalworking forums and communities: Websites like Reddit’s r/metalworking or Practical Machinist offer a treasure trove of shared knowledge, including detailed plans and construction tips from experienced metalworkers.
- Dedicated DIY project websites: Platforms like Instructables.com feature a range of project guides, complete with step-by-step instructions, materials lists, and user insights.
- YouTube tutorials: Many experienced metalworkers and machinists share their project videos on YouTube, showing the entire process of constructing roller bending machines. These visual guides can be incredibly helpful.
- Technical books and eBooks: Look for publications specializing in metalworking projects. These often include detailed plans, materials lists, and theoretical background necessary for understanding how to make a steel roller.
When choosing a plan, consider the following:
- Complexity: Select a design that matches your skill level and the tools available to you.
- Materials: Opt for plans that use readily accessible materials or those you already have.
- Size and Capacity: Ensure the design suits the scale of projects you plan to undertake with your roller bending machine.
Starting Your Project
Armed with a comprehensive plan and understanding the importance of meticulous preparation, you’re now ready to embark on the journey of building your homemade roller bending machine. Remember, the process of figuring out how to make a steel roller is as much about the learning experience as it is about the final product. Take your time, stay safe, and enjoy the satisfying process of bringing your DIY roller bending machine to life.
How to Make a Steel Roller: Planning and Design Considerations
When embarking on the task of how to make a steel roller, strategic planning and intricate design are necessary. The process begins long before any metal is cut or welded—it starts with a solid plan on paper. Below let’s discuss six essential considerations that underpin the design phase of a metal roller bending machine, directly addressing capacity concerns alongside other crucial elements.
Six Design Considerations for a Steel Roller Bending Machine
- Determining Size and Capacity:
The initial step in grasping how to make a steel roller involves selecting the appropriate size and capacity. These two features are perhaps the most significant, dictating the maximum width and thickness of metal that your bending machine will be able to manipulate. Size decisions should cover the length of the rollers, the distance between them, and the overall dimensions of the frame. Capacity, on the other hand, refers to the maximum load the rollers can exert on the material without distortion or machine damage. - Material Strength and Durability:
The materials elected for construction will impact the machine’s longevity and effectiveness. For a sturdy frame, you would likely opt for heavy-gauge box-section steel. Rollers themselves need to be crafted from hardened materials to resist wear and deformation over time, especially if they are to accommodate high-capacity bending operations. - Flexibility and Adjustability of Rollers:
The central component of any bending machine is its rollers, especially the adjustable sliding roller. Flexibility in the design is essential to manage different metal widths and bending radii. This means incorporating a reliable mechanism, such as screw-adjusted or hydraulic-assisted movement, enabling the operator to alter the position of the sliding roller easily. - Operational Efficiency:
Beyond how to make a steel roller functionally robust, consider its operational efficiency. It should be designed in a way that allows smooth and easy feeding of materials and a quick set-up. This includes contemplation of power systems, like manual, electric, or hydraulic, and how they will influence the speed and force of the bending process. - Precision and Accuracy:
Precision governs quality. Bearing systems for the rollers should be precise and have minimal play to ensure accurate bends. Calibration marks and indicators might be included to assist the operator in making consistent bends every time. - Safety Features:
Lastly, any discussions around how to make a steel roller should address safety. The design should include finger guards, emergency stop mechanisms and should adhere to relevant safety standards to prevent accidents during operation.
When moving from concept to creation, these are the fundamental building blocks of the planning and design phase. They set the stage for a robust, dependable steel roller bending machine that not only meets but exceeds the expected demands of metalworking tasks.

How to Make a Steel Roller: Instructions for Building
The next crucial step in the process of how to make a steel roller is to construct a solid and reliable framework. The strength and stability of your steel roller will depend significantly on the effectiveness of your framework. Let us delve deeper into detailed instructions for building robust frames using either L-shaped steel or box-section steel.
Assembling the Frame using L-shaped Steel or Box-section Steel
Building a workable frame necessitates precision and a thorough understanding of the principles that govern how to make a steel roller. Here are the steps for each material:
L-Shaped Steel:
- Measuring and Cutting: Start by measuring out the lengths needed for your frame. Accuracy is crucial as uneven lengths can lead to an unstable frame. After you have marked the necessary lengths on the L-shaped steel, proceed to cut them using a standard hacksaw or a metal cutting saw.
- Preparing for Assembly: Once cut, lay out the pieces on a flat surface to simulate the final layout. Check for square corners and equal lengths on opposing sides to ensure the alignment of your structure.
- Welding: Begin welding the pieces together at the corners. You can use MIG or TIG welding methods, depending on your preference.
- Adding Reinforcements: Depending on the demands of your steel roller, consider adding additional reinforcements to your L-shaped steel frame, such as welding extra diagonal braces at concerning points.
Box-Section Steel:
- Measuring and Cutting: Similar to the process with L-shaped steel, commence with accurate measurements and cuts. Because box-section steel is typically thicker, a metal cutting saw might be necessary to make clean cuts.
- Preparing for Assembly: Lay out the cut pieces in the shape of your final frame. Ensure all angles are true and equal in length.
- Welding: Start welding the pieces at the corners. When working with box-section steel, it may be wise to start with tack welds on each corner initially, rechecking your measurements before finishing the welds.
- Reinforcing: For a box-section steel frame, reinforcement doesn’t always involve adding more material, but rather drilling holes and adding bolts across corners to ensure they stay square and stable.
- Grinding: After your frame has been assembled, grind down any rough welds that could interrupt the placement or movement of adjustable components.
Learning how to make a steel roller entails understanding and appreciating the importance of a solid and well-assembled frame to ensure a durable and efficient roller bending machine. By following these steps carefully, you can guarantee a well-constructed frame suited to your needs.

steel roller
How to Make a Steel Roller: Steps to Assemble the Rollers
One of the most critical stages in understanding how to make a steel roller is assembling the rollers themselves. This component is what distinguishes a simple frame from a functional metal bending machine. Special attention must be given to the setting of the sliding roller, which is pivotal for bending metal with precision and efficiency. Follow these detailed steps to accurately assemble the three rollers of your steel roller machine.
Step-by-step Process for Roller Assembly
- Selecting the Rollers:
- Begin by choosing rollers that are compatible with the frame you’ve built, paying attention to the width and diameter. The diameters of the rollers will largely determine the smallest radius you can bend. Rollers are typically made of hardened steel for durability.
- Mounting the Fixed Rollers:
- The first two rollers to install are the fixed rollers. These should be mounted at the top and bottom (or front and back, depending on your design) of the frame.
- Ensure that these rollers are perfectly aligned with each other to keep the metal sheet or rod being bent in a straight line.
- Installing the Sliding Roller:
- The core of bending metal effectively lies in how the sliding roller is set up. The sliding roller adjusts to accommodate different thicknesses of metal and allows for the adjustment of the bending radius.
- Position the sliding roller between the two fixed rollers. This roller must be mounted in such a way that it can move closer or further away from the fixed rollers, which is crucial for bending metal of varying thicknesses and achieving different radii.
- Implementing an Adjustment Mechanism:
- A critical step in how to make a steel roller operational is incorporating an adjustment mechanism for the sliding roller. This could be a screw mechanism, hydraulic system, or any other method that allows for controlled movement.
- The adjustment mechanism should offer precise control over the sliding roller’s position, enabling fine-tuning of the bending process.
- Aligning and Testing the Rollers:
- Once the rollers are in place, it’s essential to check their alignment using a level or straightedge. Proper alignment ensures uniform bends and reduces wear on the rollers.
- Test the assembly with a piece of scrap metal to ensure that the rollers move smoothly and that the adjustment mechanism works as intended.
- Securing the Rollers:
- After testing, secure the rollers firmly in place, making sure that all connections and adjustments are tight and stable.
- Regularly inspect the roller assembly for any shifts in alignment or loosening of components, as these could impact the quality of your bends.
Mastering how to make a steel roller includes not only understanding the assembly of its parts but also appreciating the precision and care needed to construct a tool that will serve well in metal bending projects. The focus on accurately setting and adjusting the sliding roller highlights its role in achieving versatility and precision in your metalworking endeavors.
How to Make a Steel Roller: Installing Bearings
An integral part of learning how to make a steel roller involves understanding the installation of bearings. Bearings play a crucial role in ensuring the smooth operation of the roller, reducing friction between the moving parts, and enhancing the machine’s longevity. Here’s a comprehensive guide on installing bearings in your steel roller construction.
Detailed Instructions for Bearing Installation
- Selection of Bearings:
- The first step is to select the right bearings for your rollers. Bearings must be capable of handling the load and speed requirements of your machinery. Typically, tapered roller bearings or deep-groove ball bearings are used due to their ability to support both radial and axial loads.
- Preparing the Roller Shafts:
- Before installing the bearings, ensure that the shafts of your rollers are clean, free of burrs, and have a smooth finish. Any imperfections on the shafts can damage the bearings and hinder their performance.
- Fitting Bearings onto the Shafts:
- Carefully fit the bearings onto the roller shafts. Depending on the fit (interference or clearance), you might need to use a press to install the bearing onto the shaft without damaging it. If heating is required to expand the inner ring for easier installation, never exceed the temperature limit specified by the bearing manufacturer.
- Securing the Bearings:
- Once the bearings are fit onto the shafts, secure them in place. This might involve using retaining rings, locknuts, or end caps, depending on the design of your roller and the type of bearing used. Ensure that these elements are correctly installed and tightened to the manufacturer’s specifications to prevent any axial movement of the bearings on the shaft during operation.
- Installing the Shaft-and-Bearing Assembly into the Frame:
- Insert the shaft-and-bearing assembly into the prepared holes or mounts in the frame of your steel roller. Make sure the alignment is precise to ensure smooth rotation and prevent undue stress on the bearings.
- Lubrication of Bearings:
- Proper lubrication is essential for the longevity and efficiency of the bearings. Use the lubricant recommended by the bearing manufacturer. If using grease, fill to the correct level—usually around 30-50% of the bearing’s internal space. Over-lubrication should be avoided as it can lead to increased temperature and drag.
- Final Checks and Adjustments:
- After installation, rotate the roller by hand to ensure that the bearing is installed correctly and rotates smoothly without excessive play or noise. Adjust as necessary, referring back to manufacturer guidelines for tolerances.
- Maintenance Planning:
- Regular maintenance and inspection of the bearings are critical. Set a maintenance schedule based on the operating conditions and the manufacturer’s recommendations to ensure your steel roller continues to operate efficiently.
What is how to make a steel roller functional and durable significantly relies on the correct installation and maintenance of bearings. This careful attention to the selection, fitting, and securing of bearings will ensure your steel roller performs optimally, serving your metalworking needs for years to come.
How to Make a Steel Roller: Incorporating an Adjustment Mechanism
In the intricate process of how to make a steel roller, setting up an effective adjustment mechanism is key for handling different metal thicknesses and bend radii. This allows for versatility and preciseness in your metalworking tasks. Let’s explore the steps involved in adding an adjustment mechanism to your steel roller design.
Detailed Guide to Adding an Adjustment Mechanism
- Understanding the Mechanism Purpose:
- The adjustment mechanism is essential for shifting the position of the sliding roller relative to the fixed rollers. This movement is what accommodates various material thicknesses and controls the bend radius.
- Choosing the Type of Adjustment Mechanism:
- There are several types of adjustment mechanisms to consider including manual screw adjustments, hydraulic systems, or even motor-driven mechanisms for automated control. The choice depends on the precision, force required, and ease of use desired.
- Designing the Mount for the Adjustment Mechanism:
- Design a mount suitable for the type of adjustment mechanism chosen. For a screw mechanism, it could involve threaded inserts or plates. For hydraulic systems, mounts should accommodate hydraulic cylinders and associated hardware.
- Installation of the Mechanism:
- Install the chosen mechanism on the frame of the steel roller. If you’re using a screw mechanism, it typically involves placing a threaded rod or bolt through a nut secured to the frame. The end of the screw will connect to the sliding roller.
- For hydraulic or pneumatic systems, ensure proper placement of the cylinder and secure it to both the frame and the sliding roller. Double-check all connections, hoses, and seals for tightness to prevent leaks and maintain pressure.
- Testing Movement and Load Capacity:
- With the mechanism in place, test the ease of movement of the sliding roller. Ensure it can move smoothly across the entire range needed for bending operations. Additionally, test the mechanism under load to confirm it can hold and adjust the sliding roller securely against the force applied during bending.
- Calibrating the Adjustment Mechanism:
- Calibrate the adjustment mechanism to ensure consistency throughout the bending process. Markings or a scale can be added to aid in the repeatability of bends and to make the operation user-friendly.
- Adding Safety Features:
- Incorporate safety features such as locks or pins that can hold the adjustment mechanism securely in place once the desired position is set, particularly essential in manual adjustment systems to prevent unintended movements during operation.
- Final Assembly Check:
- Once installed and tested, conduct a final assembly check. Ensure all components of the steel roller work harmoniously and that the adjustment mechanism functions smoothly and precisely.
By meticulously setting up an adjustment mechanism, you optimize the functionality of your steel roller. This critical step is fundamental in learning how to make a steel roller adaptable to various metalworking scenarios, enabling you to achieve precise bends and curves on different thicknesses of metal with consistent accuracy.
How to Make a Steel Roller: Testing and Adjusting the Machine
Once the steel roller assembly is complete, the final step in mastering how to make a steel roller includes a crucial calibration phase, which involves testing and adjustments. The fine-tuning ensures the accuracy of the machine and its capability to handle a variety of metal sizes and types. This guide will help you understand the procedures and considerations necessary for this important stage.
Testing and Adjustment Procedures
- Initial Test:
- Start with a broad test by using a piece of scrap metal. Pass it through the rollers to check the overall operation. Make sure the metal feeds smoothly into and out of the machine. Observe the action of the rollers and ensure the metal bends as expected.
- Inspection of Rollers & Bearings:
- After the initial test, examine the rollers and bearings. The movement should be smooth without any jams or unnecessary friction. The bearings should rotate freely without any noticeable play or noise that might indicate an incorrect installation.
- Adjustment for Different Metal Thicknesses:
- In learning how to make a steel roller adjustable to various metal thicknesses, understand how to reposition the sliding roller by using your adjustment mechanism. Experiment with different thicknesses of metal and take note of the settings that provide the best results for each thickness.
- Checking Bending Radius:
- Next, inspect the bending radius achieved with different settings. This will allow you to calibrate your machine for precise bends in future projects. Use a radius gauge to measure the curvature attained and adjust the sliding roller accordingly for more or less bend.
- Test Different Types of Metals:
- Different metals have varying levels of malleability, and thus, the machine must be adjusted to handle these differences. Test your machine with different types of metals—such as steel, aluminum, or copper—to understand how the machine performs and how to adjust the sliding roller for each material type.
- Precision Test:
- To test the precision of your steel roller, use metal markings or a set pattern that requires accurate bending. See if the machine can replicate the expected outcome repeatedly, and make fine adjustments as necessary.
- Functional Check of Adjustment Mechanisms:
- Finally, check the ease of use of your adjustment mechanisms, and ensure they can handle repetitive adjustments without loosening or binding over time.
- Safety Check:
- After all adjustments, make sure the machine operates safely, with all moving parts secure and any guards or safety devices in place and functioning correctly.
Mastering the art of how to make a steel roller requires patience and precision, especially during the testing and adjustment phase. Through careful calibration and a thorough understanding of your machine, you can ensure its reliable operation and adjustability to handle a wide range of metalworking tasks.
Our conveyor rollers are designed for peak performance.
FAQs about How to Make A Steel Roller
A metal roller is often referred to by several names, which can depend on the specific function or type of rolling performed. Generally, it can be called a ‘rolling mill’ in industrial settings. When focused on smaller operations or shops, it might be termed a ‘ring roller’, ‘sheet metal roller’, or ‘plate roller’, based on its application. For instance, a rolling mill designed for producing flat sheet metal would typically be known as a ‘sheet metal roller’. In the context of creating circular metal bands or rings, the tool is often referred to as a ‘ring roller’. This versatility in nomenclature reflects the diverse capabilities and uses of metal rollers across various metalworking activities.
A metal roller operates based on the principle of passing metal stock through one or more pairs of rolls to reduce thickness, create uniform thickness across a width, or impart a desired mechanical property like curvature or texture. Specialized rollers are built for custom applications, such as the ‘slip roller’ or ‘bead roller’, each designed to accomplish a specific type of metal forming. Regardless of their specific designation, all these tools are built upon the foundational mechanical principle of exerting controlled pressure to shape and form metal materials.
Rolling sheet steel involves a series of steps that ensure the material is formed to the desired shape and thickness uniformly. The process generally entails:
Preparation: The steel is heated to the appropriate temperature. This process, known as hot rolling, can greatly reduce the strength and resistance of the steel, making it easier to roll. If precision is more critical than the ductility or there are concerns about scale or oxidation, the metal may be cold rolled.
Feeding the Rolling Mill: The heated (or cold) sheet steel is then fed through a rolling mill, which typically consists of a series of rollers that apply pressure to the metal. The gap between the rollers is adjusted to the final thickness desired. As sheet steel is passed through the rollers, it is squeezed thinner and lengthened.
Multiple Passes (if necessary): Usually, rolling sheet steel to the desired thickness requires multiple passes through the rollers, with slight reductions in thickness on each pass. Between passes, it’s crucial to let the metal’s temperature and structure stabilize.
Rolling sheet steel can add textures and be performed to various degrees of precision based on the end-use of the metal product. It is commonly performed in metal fabrication and is a key step in producing items ranging from automotive panels to construction materials.
Making a ring roller, which is a specialized tool used to bend metal strip, rod, or tube into rings or curved sections, requires precision and careful planning. Here’s a breakdown of the basic fabrication process:
Design: Begin by detailing the specifications for your ring roller, considering the size of the material it needs to handle and the radius of the curves you’ll require.
Frame Construction: Construct the base frame using sturdy materials capable of withstanding the stress of bending metal—steel is often the material of choice for durability and strength.
Roller Fabrication: Fabricate the rollers, which are the pivotal components of the ring roller. These can be made from hardened steel and should be designed to rotate freely on bearings.
Mechanism for Adjustment: Integrate an adjustment mechanism, which allows the distance between rollers to be altered for different bend radii and material thicknesses.
Assembly and Testing: After assembling all the components, test the machine with various materials to ensure it operates smoothly and makes precise bends. Adjustments to the mechanism can be made during these test runs.
For those not inclined toward DIY fabrication, commercial ring rollers are available. However, building one’s own ring roller can be a rewarding project for experienced metalworkers, offering customization possibilities that pre-made equipment may not.
Metal rollers work by employing two or more cylindrical rolls, oriented horizontally, that rotate in opposite directions. When metal stock is passed between them, the gap between the rolls—a setting adjusted by the operator—determines the degree of thickness reduction or the radius of the bend.
In the case of sheet metal rollers used for bending, there are generally three rollers; the metal is passed through the two bottom rollers and curled around the top, central roller, which can be adjusted up and down to change the curvature of the bend. The key to the rolling process is uniform pressure application across the material width and maintaining a consistent speed to ensure a smooth finish.
The work rolls are often backed by larger rolls that give them rigid support under the enormous pressure exerted on the metal. These machines can be manually operated or powered by electric motors for larger scale or industrial operations. The fundamental efficiency of metal rollers lies in their ability to apply significant mechanical force in a controlled and uniform manner.
Last Updated on July 17, 2024 by Jordan Smith
Jordan Smith, a seasoned professional with over 20 years of experience in the conveyor system industry. Jordan’s expertise lies in providing comprehensive solutions for conveyor rollers, belts, and accessories, catering to a wide range of industrial needs. From initial design and configuration to installation and meticulous troubleshooting, Jordan is adept at handling all aspects of conveyor system management. Whether you’re looking to upgrade your production line with efficient conveyor belts, require custom conveyor rollers for specific operations, or need expert advice on selecting the right conveyor accessories for your facility, Jordan is your reliable consultant. For any inquiries or assistance with conveyor system optimization, Jordan is available to share his wealth of knowledge and experience. Feel free to reach out at any time for professional guidance on all matters related to conveyor rollers, belts, and accessories.

